Wednesday, January 19, 2011

Bad News, Good News

Bad News first. Our roof leaked.........Again! Six and a half years ago, we had several leaks fixed and they all held until this last winter storm. Four days of steady rain was just too much. Christmas Eve, we noticed a very foul smell in our bedroom. We saw the wet walls and ceiling. The smell got worse. Day four Dave decided to cut some holes in the wall and see what was happening behind the big wet spots. We moved a couple of dressers and found the carpet was soaked. The telltale sign was the brown outline of the dressers. We pulled the carpet up and found the padding was soaked and even the plywood underneath. Dave cut out the padding and turned a fan on the whole mess. Long story short. The smell finally went away, we have a $3700.00 roof repair to take care of and insurance is paying for new drywall, new paint and new carpet. What a mess!

This is what I look at when I wake up in the morning.


Good News. I have a new pattern almost finished. Well, it is finished. Just some more proof reading needed. Of course, it uses my Stitching Lines! What else is new!! LOL I am calling it Diamond Quilt, because, well, that is what it is!
Hopefully, I will have the pattern up on my website with the next two weeks.

Now on to something new. I have an idea for a new quilt that is mostly Flying Geese. And of course I will use my Stitching Lines.


I am giving this quilt to Amie today. She has two more finished quilts to give me. I already know the quilting will be amazing!

Monday, December 27, 2010

All Pieced Together

Like all of you out there in Blogland, it's been a few days since I have been able to sew anything. But now it is time to get back to quilting.
I finished the last seam this morning on my Diamond baby quilt. I think I may add a narrow border, only because sometimes the points get cut off when I add the binding. I usually use a little wider than a 1/4" seam allowance when I put on bindings. Just have to see if I can find something in my stash that will work. My daughter Jill gave me a machine quilting book for Christmas and it is inspiring me to try something different in my quilting. Can't wait to give it a try.

Friday, December 17, 2010

Blocks On the Floor

Last post, I showed you all the squares I had cut out with my new GO cutter.

And this is what I have done with them.

Only with my camera, can I see a pattern going on. I hope you can see some kind of order. Once I have all the blocks made, I will fiddle with the arrangement some more.


What is it with a dog and quilt blocks on the floor? Is there some kind of perceived softness? Is there a voice in the fabric saying " Let's cuddle up"?
Because there are other places to lay down in my sewing room.


In the end, the fabric won out and Tess fell asleep.

Monday, December 13, 2010

A New Way To Cut It All Up

My Christmas shopping is practically done. Yipee! that's a first for me. I usually wait until the last minute. I don't know what inspired me. It's a bit easier this year. Two of my Bah Humbug children decided they didn't want to exchange presents this year. First born Jill to the rescue! They all decided to drastically limit the quantity and the money spent. And I'm OK with that.

So, now I have time to do what I like to do. Make quilts, of course! I bought myself an early Christmas present this year. You could say it is a business expense. I am getting ready for my first show in February, by cutting tons of 3-1/2" squares with my new GO cutter. .
These will all turn into Half-Square triangles made with Stitching Lines.


I think I need to cut some orange squares. that's next.
I learned quickly the key to success in cutting with the GO cutter. I have to put the fabric on the die in the right direction. And a piece of paper on top of the fabric seems to be needed to get accurate cuts. But that's a small price to pay for the speed of cutting. I think I really like this cutter.

Wednesday, November 24, 2010

Thanksgiving and Black Friday

It's almost Black Friday. And who doesn't like and want a discount. I know I do! Check out my Etsy shop and use the code blackfridayblog when you check out. It's easy and free to join Etsy if you never have. Registration is just your name and email.

Have a wonderful Thanksgiving. I wish I could say I was ready, but I procrastinate way too much, so still have plenty to do. I am cooking gluten and dairy free this year, so I am trying out new things.

I need to keep my hands off of this:
Chex Ginger-Honey Crunch. It is absolutely delicious.


Friday, November 19, 2010

Mug Rug Again

I finished another Mug Rug.

Peacock fabric for the back and binding.

Two makes a set!

Thursday, November 18, 2010

Mug Rug


I used to put my coffee cup on a coaster. That's what I called it. But someone always comes up with a better name. Now it's a "Mug Rug" and I love that name. I made one today. It's bigger and better than just a plain old coaster. But it also took me a little longer to make. Here are the steps.


I cut 2" squares from three different color families, one from each of 24 fabrics. The photo shows the yellow squares only. I had already made the other blocks before I started this tutorial.

Then I made Half-Square triangles using my Stitching Lines.


I pressed the Half-Square triangles to the dark side. You could press them to the lighter side if you like.

I made the HST's larger than I needed, so then I squared them up to 1-1/2"

I placed the HST's where I wanted them.
The seam on the upper left square is pressed up, the seam on the upper right side is pressed down. the lower squares are opposite. Then everyone is happy and seams fit together nicely!


I sewed the HST's together and pressed them all in the same direction.

I made two identical blocks.

I sewed the two halves together.

And then I removed the last few stitches between first stitching line and cut edge.

I pressed half of the seam one way, and the other half the other direction.
Then I arranged how I wanted the blocks.

And sewed them all together.. Again I removed the last few stitches at each intersection, so I could press the seams all flat.
This photo shows all the seams going every which way. But it makes for a nice flat quilt top.

Here is the front side, all nice and trimmed and squared up.

I added a 1" cut border to the four sides.
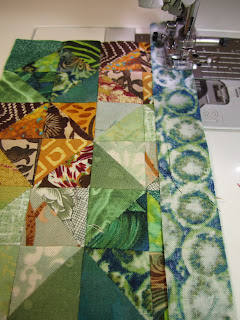
I stacked up the three layers.... backing, batting and top.

I quilted it with a simple "Stitch in the Ditch".

Now it is bound and done.
Just big enough for a mug and some goodies.

Related Posts Plugin for WordPress, Blogger...