It's a parallelogram and it couldn't be easier to construct.
I used a 3-1/2" x 6-1/2" brown rectangle and (2) 3-1/2" white squares.
I placed the first square on one corner of the brown rectangle.
I placed the trimmed Stitching Lines strip so that the dotted line on the right side lined up with the corners of the white square and stitched on the dotted line.
Then I stitched on the other dotted line and ripped off the paper.

Next, I placed the second white square on the opposite corner, just like if I was making a Flying Geese rectangle.
I placed the Stitching Lines strip parallel with the first stitching, lining up the left dotted line with the corners of the white square and stitched. I stitched on the second dotted line and ripped off the paper.
 I cut apart between both sets of stitched lines and pressed the seams.
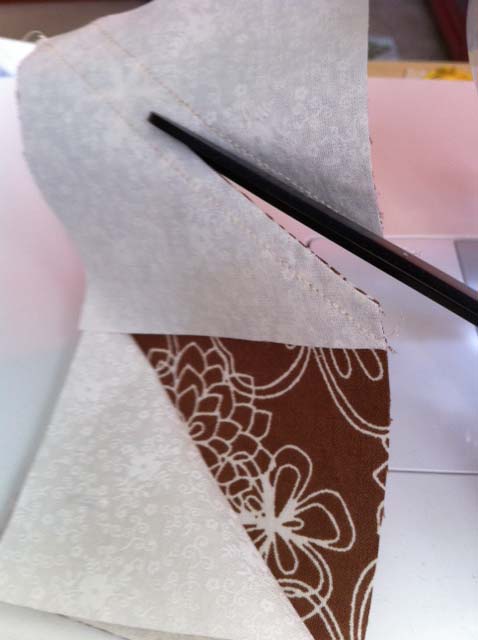

And what I got was one parallelogram rectangle and two half-square triangles.
 A parallelogram could be any length. Mine just happens to be a finished 3" x 6".
Just make sure the small squares are the same width as the width of the rectangle.
This is where I put all my used up Stitching Lines. And no, as so many customers at shows have asked, you can't reuse them. But I do recycle this with my newspaper. Well, actually, you could reuse the center strip that you tear out, if you are making a snowball corner and only need one stitching line. See this post where I show how.


2 comments:
Now that's a new one, Mary! Do I see a new pattern emerging? Thanks for the tip - I know of a "few" scraps that would like to be re-born into these block! I resuse all my SL's down to the very last line and keep them in little baggies according to size!
Cheers!
I've been making a lot of flying geese with mine lately (same concept as the parallelograms), makes it soooo much easier.
Post a Comment